


To bury landscape lighting wire, dig a shallow trench about six inches deep, lay direct-burial-rated low-voltage cable in it, seal every connection with waterproof gel connectors, and backfill the trench. Before you dig a single inch, call 811 — the free national service that marks underground utility lines so you do not hit gas, electric, or water lines with your shovel.
Low-voltage lighting runs at 12 or 24 volts, so it is far more forgiving than burying line-voltage cable — but “low voltage” does not mean “no risk.” A shallow trench through an unmarked gas line or fiber-optic cable can cost thousands of dollars and can genuinely hurt someone. Done right, though, buried wire is the difference between a clean, professional-looking yard and cables lying across the mulch waiting to meet the lawn mower.
This guide covers the whole job: the 811 call, the tools and cable you need, how deep to dig, how to route the trench, and how to make connections that survive years underground. Plan on a Saturday morning for a typical 8-to-10 fixture layout.
Safety First: Call 811 Before You Dig Anything

This step is not optional, and it is not just for big projects. Utility locators treat a six-inch lighting trench the same as a fence post hole — digging is digging. Calling 811 is free, the marking is free, and the call takes a few minutes. Skipping it is the single most expensive mistake in this project:
- Mark your dig area in white. Before calling, outline where you plan to trench using white marking paint, white flags, chalk, or even baking flour. This tells locators exactly where to look.
- Call 811 or file a ticket online at least two to three business days before you dig — call 811 before any digging project, since state rules set the exact waiting period. Have your address, dig location, and start date ready.
- Wait for the marks. Utility locators mark gas, electric, water, sewer, and telecom lines with color-coded paint or flags: red is electric, yellow is gas, orange is communications, blue is water, green is sewer.
- Respect the marks and hand-dig near them. Stay at least 18 inches from marked lines where possible, and dig only by hand inside that tolerance zone — no picks, no power trenchers. Utility safety pages spell out safe digging steps for residential projects in detail.
One thing 811 will not do: mark your private lines. The water pipe from the meter to your house, irrigation lines, invisible pet fence wire, and old wiring to a lamp post or shed are yours to find — hand-dig any section where you suspect those run.
Why bother for such a shallow trench? A cut gas line or fiber cable does not care that you only went six inches down — utility lines are often shallower than people expect, and one utility survey put the average repair bill after a dig-in around $3,500. The locate is free. The repair is not.
Transformer and Electrical Safety
The wire is low voltage, but the transformer plugs into a 120-volt outlet — and that side follows normal electrical rules. Plug the transformer into a GFCI-protected outdoor outlet, and mount the transformer itself at least 12 inches above the ground on a post, stake, or the side of the house so it stays out of standing water.
When to Call a Pro Instead
DIY burial is fine for a simple low-voltage run. Call a licensed electrician if you need a new outdoor outlet installed or the transformer must be hardwired. Call a landscaper if 811’s marks show utilities blocking your route, or if the soil is full of roots and rocks.
Tools and Materials You Will Need
You probably own half of this already. Here is the full kit for a typical project:
- Direct-burial-rated 12/2 low-voltage landscape cable — two-conductor copper wire made specifically for underground landscape lighting. A 100-foot spool typically costs around $67–$75 (prices checked 2026-10-02). Buy 20–30% more than your trench measures — slack at every fixture saves you later.
- Waterproof gel-filled wire connectors — silicone- or dielectric-gel-filled twist nuts rated for wet locations and direct burial. A 20-pack usually runs about $10–$20 (prices checked 2026-10-02); you need roughly two per fixture plus spares.
- Low-voltage transformer — sized to your total fixture wattage with 20–25% headroom. Plugs into a GFCI outdoor outlet.
- Flat spade or trenching shovel — a flat-bottomed spade cuts a clean 6-inch slit in turf without tearing it up.
- Hand trowel and garden rake — for detail work near marked utilities and for backfilling.
- White marking paint, flags, or chalk — to outline the trench route for your 811 ticket and your shovel.
- Tape measure and string line — for laying out straight, even runs.
- Wire strippers and a multimeter — for stripping fixture leads and testing voltage at the far end of the run before burying.
- Work gloves and safety glasses — soil hides rocks, roots, and rusty surprises.
Skip regular extension cord wire or leftover indoor cable for this job. Neither is rated for direct burial — the jacket breaks down underground, wicks moisture into the copper, and turns your lighting system into a corrosion problem within a season or two.
How Deep to Bury Landscape Lighting Wire
You bury landscape lighting wire about six inches deep in a shallow trench, using direct-burial-rated low-voltage cable and waterproof gel connectors — and you call 811 before you dig anything.
| Cable type | Minimum burial depth | What to know |
|---|---|---|
| 12/2 direct-burial landscape lighting cable (12V or 24V) | ~6 inches | Industry standard for low-voltage runs; deep enough to dodge aerators and shovels |
| Landscape cable inside PVC conduit | ~6 inches | Same shallow trench, but conduit adds protection under driveways, paths, and rocky soil |
| Line-voltage cable (120V, for comparison) | 18 inches | Required by NEC Table 300.5 in residential yards; usually needs a permit and inspection |
Keep low-voltage cable physically separated from gas and electric lines wherever they cross your route. If 811 marks show a gas or electric line near your trench, reroute around it rather than digging over or under it — and never stack your lighting cable in the same trench as another utility’s line.
Plan Your Trench Route Before You Dig
An hour of planning saves an afternoon of re-digging. Walk the yard with your fixture layout and work out the trench path with garden hose laid on the grass before you cut any turf.
Map the Fixtures and the Transformer
Start at the transformer location — ideally a GFCI outlet near the house with a short path into the yard. From there, route the main cable past each fixture in a chain, keeping the total length as short as practical. Shorter runs mean less voltage drop, which keeps the last fixture in the chain from glowing dimmer than the first. If your fixtures are not picked yet, our full low-voltage landscape lighting install guide covers fixture layout, transformer sizing, and voltage-drop math in detail.
Mark each fixture spot and the trench line with white paint — this is the line you submit with your 811 ticket and the line you dig along.
Route Around Utilities, Not Through Them
Once the 811 marks are down, adjust your white line to give every flag a wide berth. Gentle curves are fine — the cable does not mind corners, just sharp bends. Where the trench must cross a path or driveway, slip PVC conduit under the hardscape at that crossing instead of cutting through it.
Plan for other yard cables too. If you are running cable for outdoor PoE security cameras, that Ethernet cable needs its own conduit and should not share a trench with lighting cable. And if your trench passes the front walk where a doorbell camera will sit, check our guide to installing a video doorbell without existing wiring before you dig — one shared trench beats two.
How to Bury Landscape Lighting Wire: Step by Step
With 811 marks on the ground and your route painted, the work itself takes a few hours:
Step 1: Dig the Trench
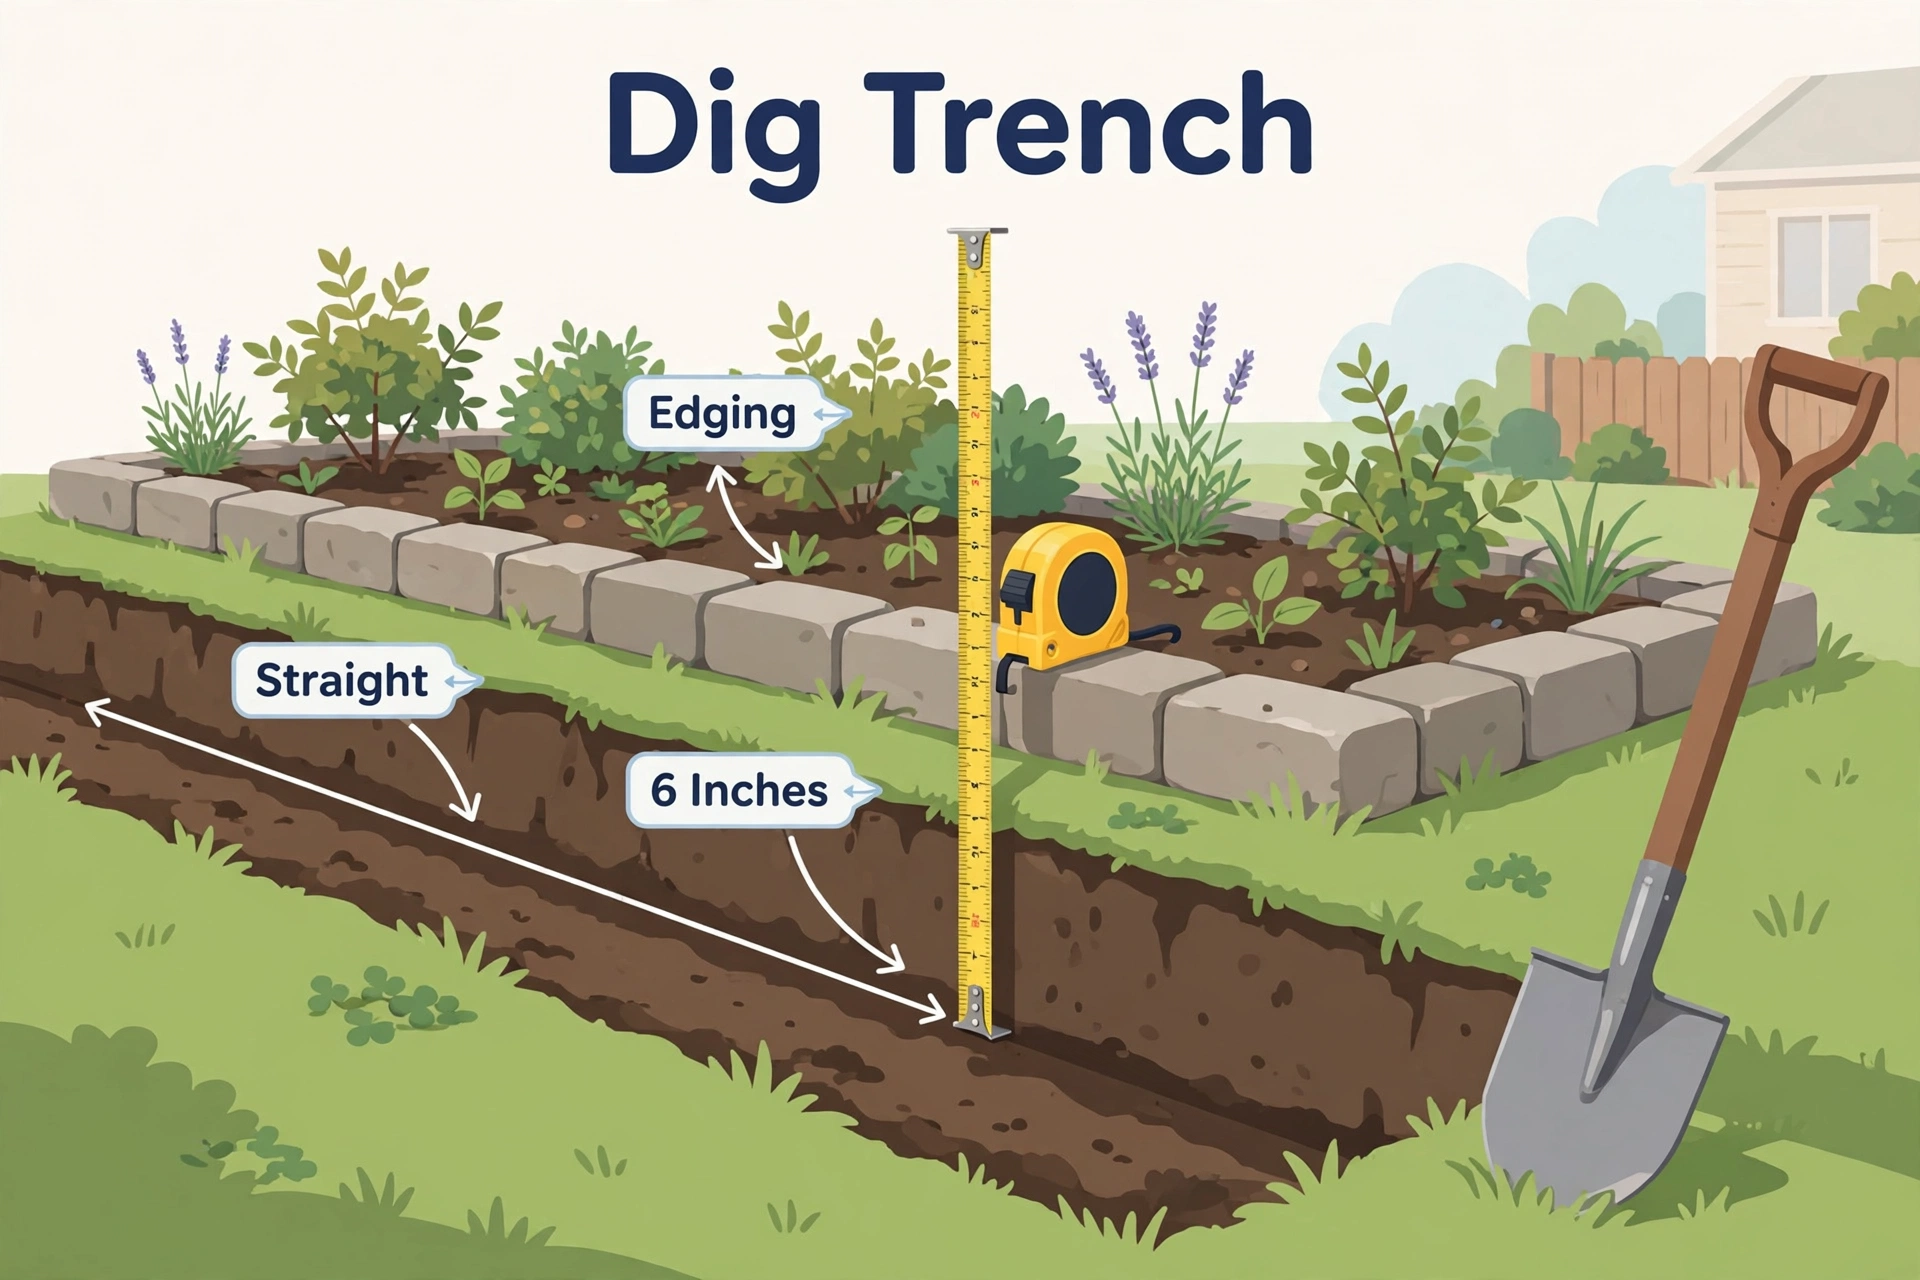
- Cut the turf along your marked line with a flat spade, slicing straight down about 6 inches, in 2-foot sections.
- Pry each section of turf up intact — like lifting a strip of carpet — and lay it grass-side down beside the trench. Intact turf is the secret to an invisible repair later.
- Pile the loosened soil on a tarp on the far side of the trench, away from the turf strips.
- Clear the trench bottom of sharp rocks as you go — anything that could press into the cable jacket comes out.
Near any 811 flags, switch to a hand trowel and feel your way — lines are sometimes shallower than the marks suggest. If you uncover anything that is not soil, stop and reroute around it.
Step 2: Lay the Cable With Slack
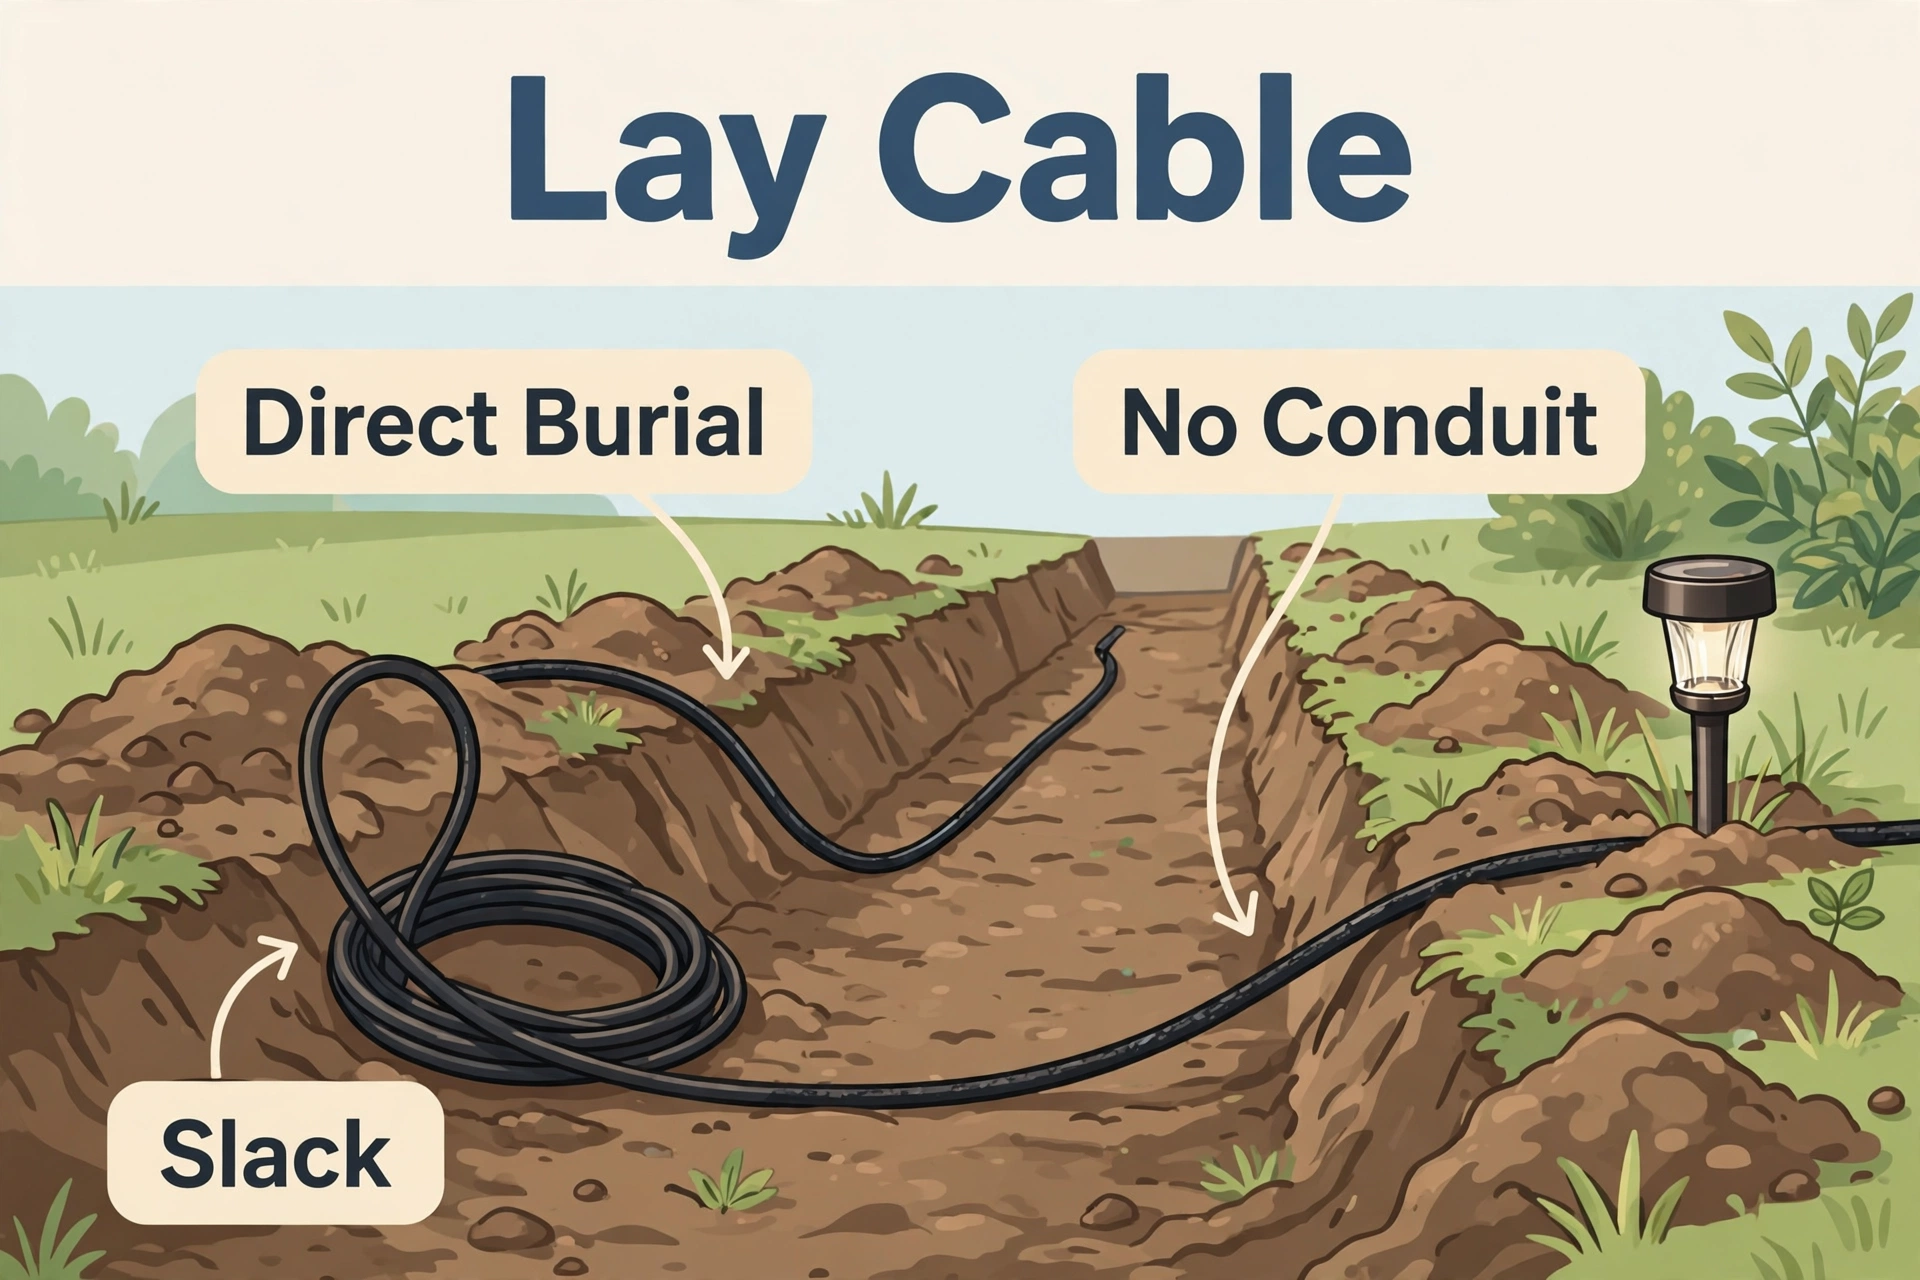
- Lay the cable in the trench without pulling it taut. Cable shrinks slightly in cold weather and shifts with the soil; a taut run tugs on connections.
- Leave 2–3 feet of slack coiled at every fixture location. Future you will be grateful when a fixture needs to move or get replaced.
- Avoid sharp bends. Sweeping curves are fine; anything close to a kink stresses the jacket.
- Leave the fixture leads long for now — trimming happens after testing.
If you are also leaving wire for permanent outdoor lights that stay up year-round, the same burial rules apply — just confirm the fixtures’ wiring method is rated for direct burial before you commit.
Step 3: Make Waterproof Connections

This is the step that separates a five-year system from a five-month system. Every underground splice and fixture tap must be sealed against moisture:
- Strip about half an inch of insulation from each wire end. Do not nick the copper — nicked strands corrode and eventually break.
- Twist the wires together firmly, thread a gel-filled connector over the joint, and twist until snug. The gel should ooze slightly around the base — that squeeze-out is the seal working.
- Give each connection a firm tug test. If it pulls apart, redo it.
- Rest connections at the trench bottom with a little slack — never hanging where water can pool around them.
Use only connectors rated for wet locations and direct burial. Never bury a splice wrapped only in electrical tape, and never use indoor wire nuts underground — tape unravels, standard nuts corrode, and both fail where you cannot see them until a whole zone goes dark.
Test Before You Backfill
This is the step people skip and then regret. With all connections made and the cable still exposed in the trench, connect the run to the transformer and plug it into the GFCI outlet. Then:
- Walk the run and check that every fixture lights up. Dim fixtures at the far end of long runs mean voltage drop — the transformer tap or cable gauge needs adjusting.
- Power off, then touch each connection and look for warmth or discoloration, which signal a poor joint.
- If any fixture is dead, the problem is in the open trench in front of you — which is exactly why you test now and not after burying it.
Only when every light is on and bright do you pick up the shovel again. Unplug the transformer before backfilling.
Backfill and Restore the Lawn
- Fill the trench with the excavated soil in layers. Break up clumps and remove rocks larger than a golf ball before they go back in.
- Tamp gently as you fill — firm enough that the trench does not settle into a visible ditch, but not so hard that you crush the cable.
- Lay the turf strips back grass-side up, press the edges together, and water the strip thoroughly. A soaked trench line knits back far faster than a dry one.
- Sketch the trench route on a simple yard map and keep it somewhere safe — future planting and digging projects will be grateful.
Watch the trench line after the first few rains. A little settling is normal; top up with soil and press the turf down if a shallow dip forms.
Bury Landscape Lighting Wire FAQs
Do I really need to call 811 for such a shallow trench?
Yes. The service is free, takes a few minutes, and exists precisely for projects like this. Utility lines are frequently shallower than people assume — a six-inch trench can absolutely reach them — and in most states the call is legally required. The two-to-three-business-day wait beats a repair bill averaging around $3,500.
Can I just lay landscape lighting cable on the ground and cover it with mulch?
You can, but do not expect it to last. Cable in mulch is exposed to mowers, string trimmers, rodents, and UV damage. A proper six-inch burial is only a little more work and is why professional installations stay trouble-free for years. Treat any surface run as temporary.
What gauge wire should I bury for landscape lighting?
For most residential runs, 12/2 direct-burial cable is the standard — it handles typical total wattages over runs up to about 100 feet with acceptable voltage drop. Longer runs or higher-wattage layouts may need 10/2, or a second run from the transformer, to keep the last fixture bright.
Do I need conduit to bury landscape lighting wire?
Not for standard direct-burial-rated cable — the jacket is designed to be buried bare. Conduit is worth it under driveways and walkways, in rocky soil, or anywhere future digging is likely, and it makes the cable replaceable without re-trenching. It is not a substitute for calling 811 or keeping distance from marked utilities.
How do I connect landscape lighting wire underground?
Strip the wire ends, join them with a firm twist, and seal the joint inside a gel-filled connector rated for wet locations and direct burial. Rest the sealed connection at the trench bottom with a little slack, and never bury a splice wrapped only in electrical tape or joined with indoor wire nuts. Test the whole run before you backfill.
Can I bury landscape lighting wire next to a gas line?
No — keep your distance. Route around marked gas and electric lines, hand-dig only inside the marked tolerance zone, and never share a trench with another utility’s line. If a gas or electric line blocks the only sensible route, that is the moment to call a landscaper or electrician to solve the routing problem.
The Bottom Line
Burying landscape lighting wire is one of those jobs where the preparation matters more than the labor: call 811 and wait for the marks, dig six inches, use cable and connectors rated for burial, test before you backfill, and put the turf back neatly. Do that, and your lighting disappears into the yard the way it should — leaving nothing visible except the light itself.
