

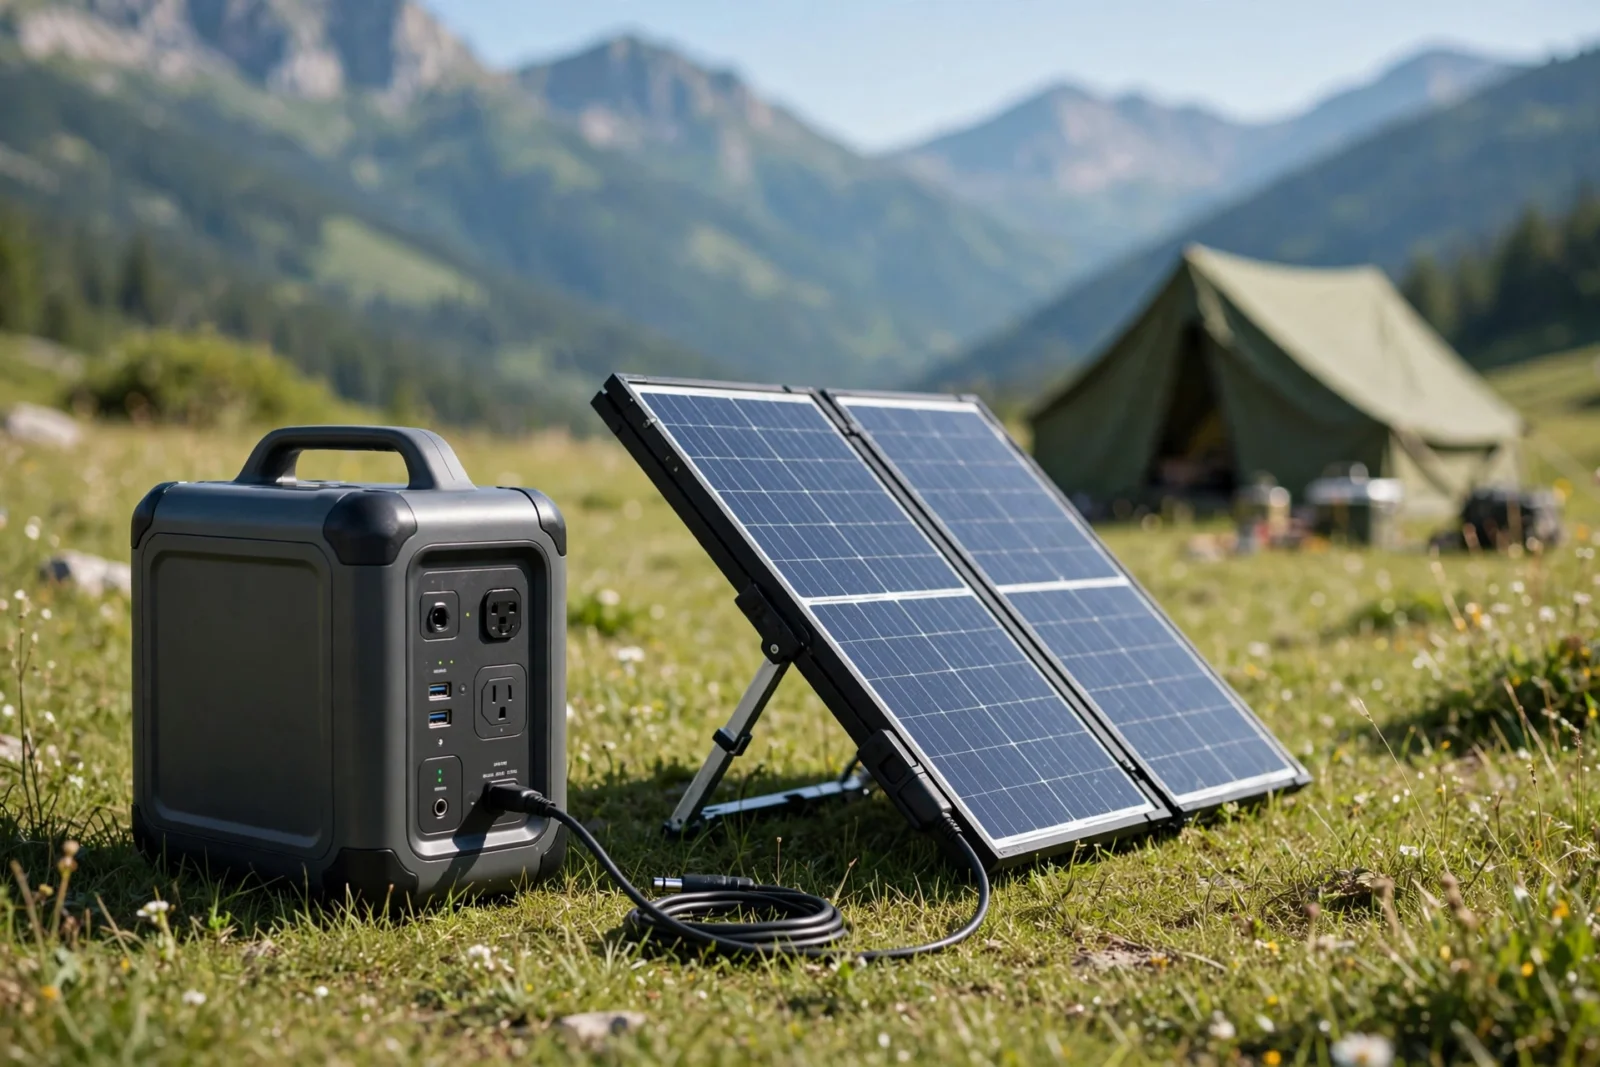
A portable power station with solar panel setup gives you free, silent electricity anywhere the sun shines — for camping, blackouts, or backup power at home. The key to making it work is sizing: your panels should roughly match your station’s maximum solar input, and your charge time is simply the battery size divided by panel wattage, plus about 30% for real-world losses. Get the sizing right and a 1,000 Wh station refills in a single sunny afternoon; get it wrong and you will wait two days for a full charge.
This guide shows you exactly how solar charging works, how to size your panels, how long charging takes with real examples, and the mistakes that waste money. No electrical engineering degree required.
How a Portable Power Station with Solar Panel Actually Charges
The idea is simple, but a few details decide whether your setup charges in three hours or thirteen. Here is what happens between the sun and your battery.
The Basic Chain: Panel to Battery
Sunlight hits the solar panel, which produces direct current (DC) electricity. That power flows through a cable into your power station’s solar input, where a built-in charge controller regulates it and feeds it safely into the battery. You use the stored power later through the station’s AC outlets, USB ports, or 12-volt car socket.
The important part: nearly every modern portable power station has the charge controller built in. You do not buy or wire a separate controller. You plug the panel into the station’s solar port (usually an XT60 or DC7909 connector, sometimes via an MC4 adapter cable), point the panel at the sun, and charging starts automatically.
MPPT vs PWM: Why MPPT Matters
Charge controllers come in two types: PWM and MPPT. PWM (pulse width modulation) is the older, simpler design. MPPT (maximum power point tracking) is smarter — it constantly adjusts to pull the maximum possible power from the panel as sunlight conditions change.
In practice, MPPT harvests roughly 20 to 30% more energy from the same panel than PWM, especially in cloudy or changing light. The good news: virtually all portable power stations sold today have MPPT controllers built in. You do not need to shop for it — just know that it is the reason your station squeezes every available watt out of your panels.
The Three Numbers That Decide Your Charge Time
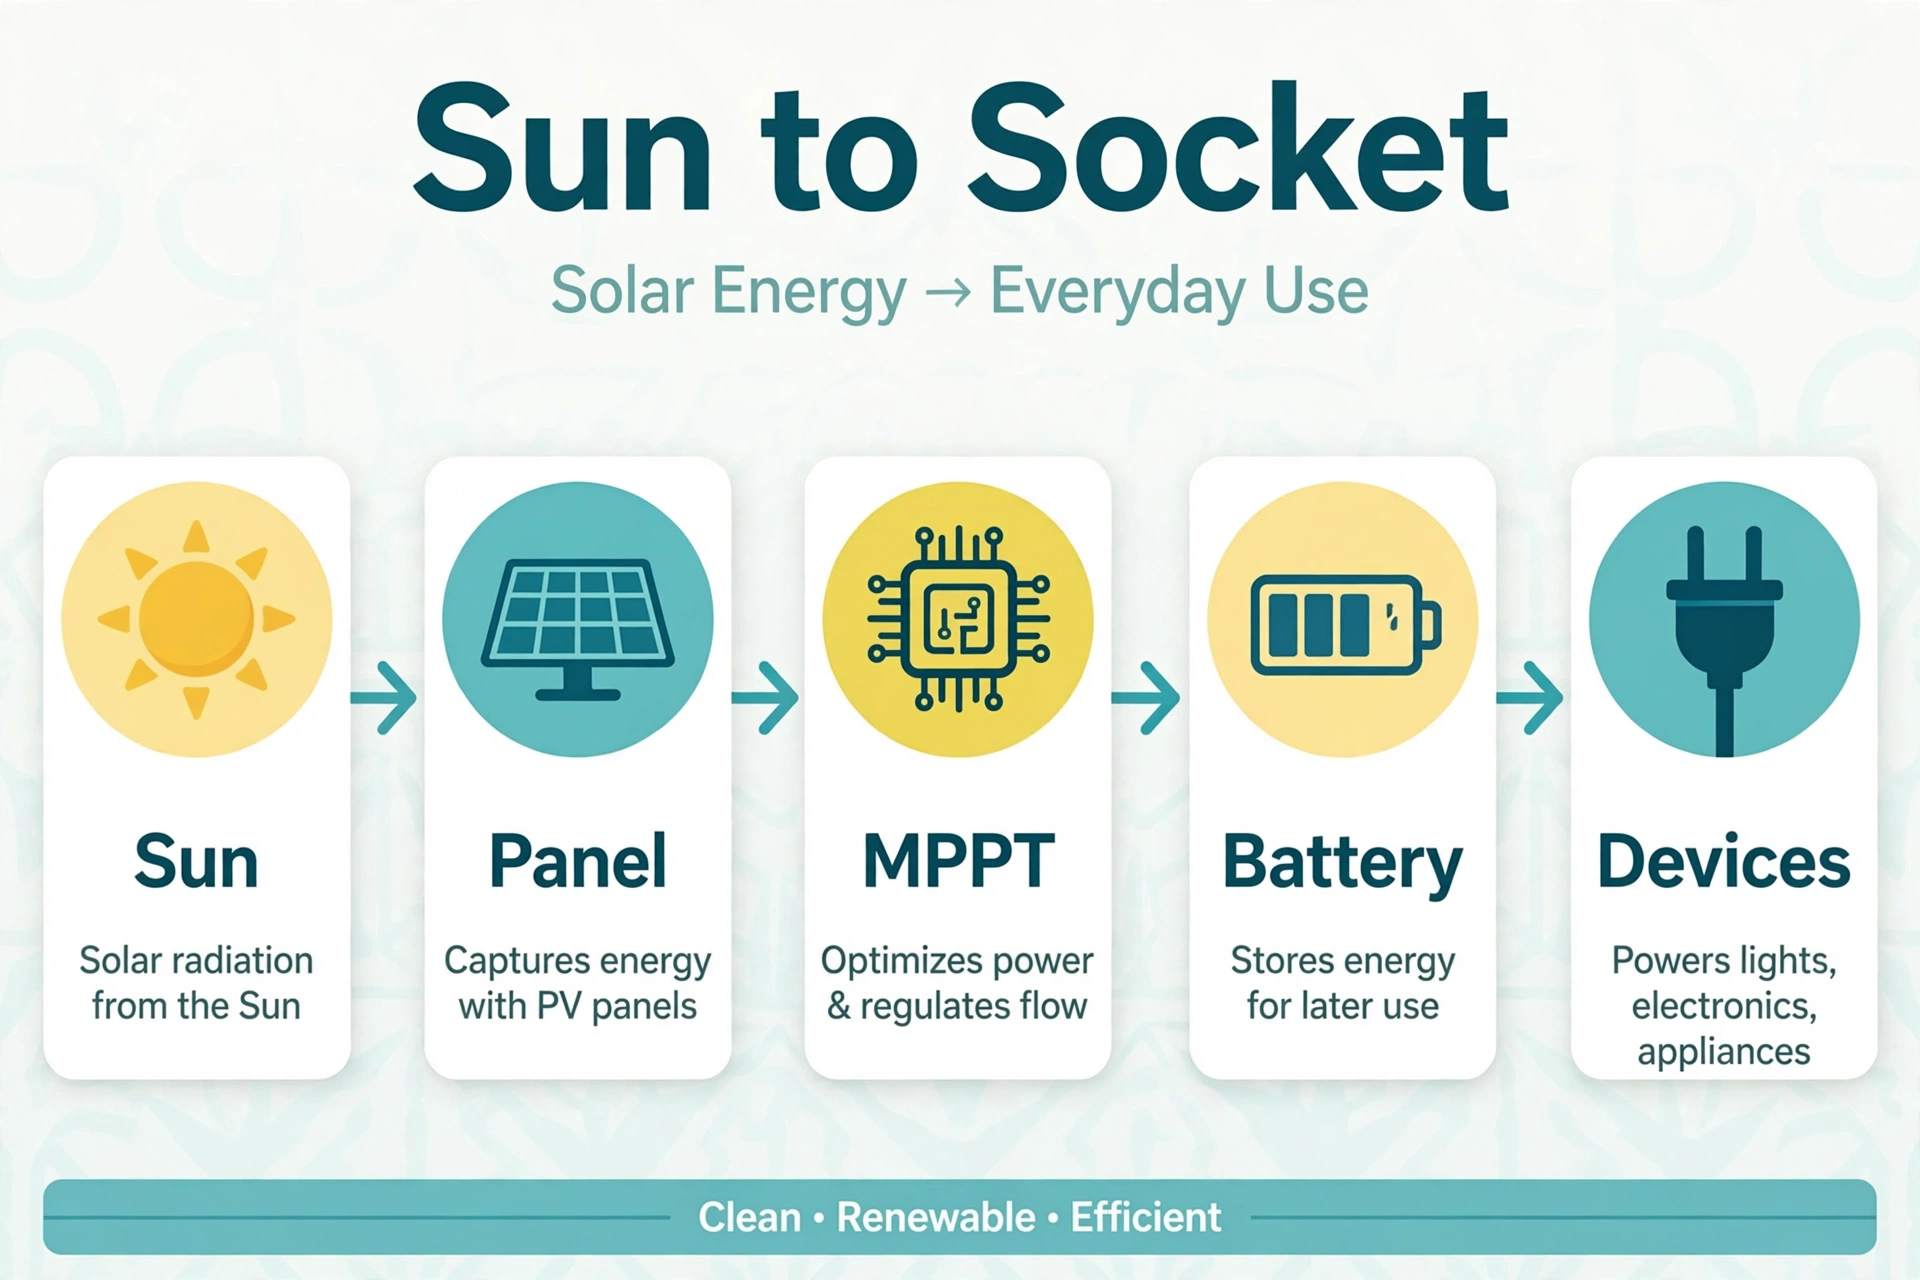
Forget the marketing. Three numbers tell you everything about how a solar setup will perform.
1. Battery capacity (watt-hours). This is the size of your station’s “tank.” A 1,000 Wh station holds roughly twice the energy of a 500 Wh station, so it takes roughly twice as long to fill with the same panel. Common sizes: compact stations around 500 Wh, mid-size around 1,000 Wh, and large backup units around 2,000 Wh.
2. Panel wattage. This is how fast energy flows in. A 400-watt panel fills a battery about four times faster than a 100-watt panel in the same sunlight. Panel ratings assume perfect lab conditions, so real output is usually 70 to 80% of the rated number.
3. The station’s maximum solar input. Every power station caps how much solar it can accept. A station rated for 500 W max solar input will not charge any faster with 800 W of panels — the extra capacity is simply wasted. Always check this number before buying panels. For example, the Jackery Explorer 1000 v2 is rated at 1,070 Wh with 400 W max solar input, the EcoFlow Delta 2 is rated at 1,024 Wh with 500 W max solar input, and the Bluetti AC180 is rated at 1,152 Wh with 500 W max solar input.
The golden rule of sizing: buy enough panel wattage to get close to — but not over — your station’s maximum solar input. That gives you the fastest possible charge without paying for panels your station cannot use.
How to Size Your Solar Panels: The Simple Formula
Here is the formula that answers “how long will it take” for any combination:
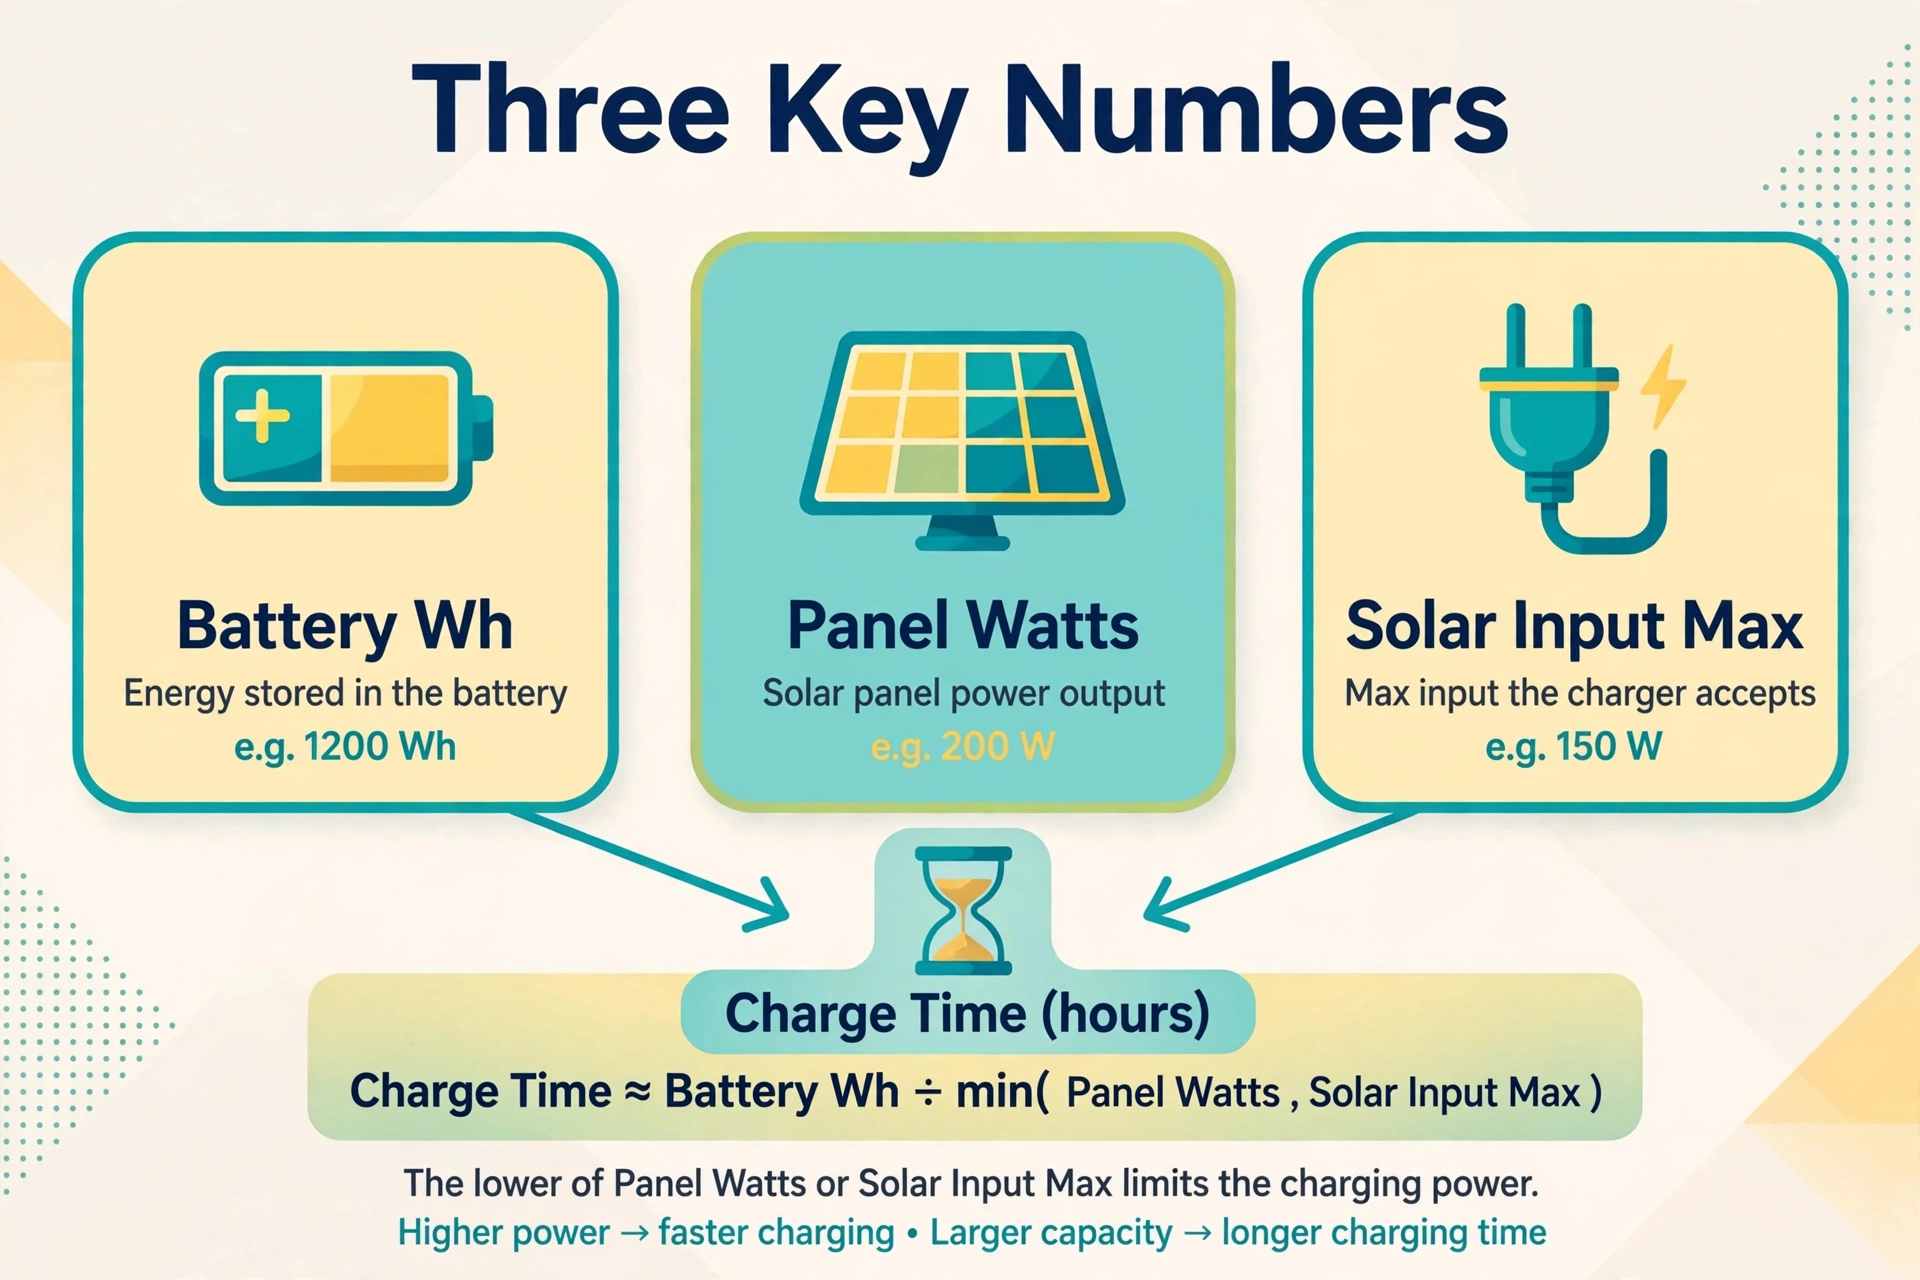
Charge time (hours) = battery watt-hours ÷ panel watts × 1.3
The 1.3 multiplier accounts for real-world losses: panels rarely hit their rated output, some energy is lost as heat, and the charge controller tapers power near full charge. In perfect conditions you will beat this estimate; on hazy days you will miss it. It is a planning number, not a promise.
Work through it step by step:
- Find your battery size. Check the station’s specs for watt-hours (Wh). Example: 1,070 Wh.
- Pick your panel wattage. Stay at or below the station’s max solar input. Example: 400 W of panels on a station rated for 400 W max.
- Divide and adjust. 1,070 ÷ 400 = 2.7 hours ideal. Multiply by 1.3 → about 3.5 hours in real sun.
- Sanity-check against sunlight. You need that many hours of good direct sun. In most places you get 4 to 6 peak sun hours per day, so a 3.5-hour charge fits comfortably in one afternoon.
If the result is longer than your available sun hours, you need more panel wattage (up to the station’s max) or a smaller station. If you are still choosing a station, our roundup of the best portable power station picks covers the sizes most buyers actually need.
Charge Time Examples with Real Stations
The table below applies the formula to popular station-and-panel combinations, using manufacturer-rated battery sizes and max solar inputs. Times assume good direct sunlight.
Table: Solar charge times for popular power station setups
| Setup | Battery size | Panel wattage | Estimated charge time |
|---|---|---|---|
| Compact station + 100 W panel | ~500 Wh | 100 W | Around 6–7 hours |
| 1,000 Wh station + 200 W panel | ~1,000 Wh | 200 W | Around 6–7 hours |
| Jackery Explorer 1000 v2 + 400 W panels | 1,070 Wh | 400 W (station max) | Around 3–4 hours |
| EcoFlow Delta 2 + 500 W panels | 1,024 Wh | 500 W (station max) | Around 2.5–3 hours |
| Bluetti AC180 + 400 W panels | 1,152 Wh | 400 W | Around 3.5–4 hours |
| 2,000 Wh station + 800 W panels | ~2,000 Wh | 800 W | Around 3–4 hours |
Notice the pattern: matching panel wattage to the station’s max input keeps every setup in the 3-to-4-hour range. Undersized panels are the number one reason owners complain about slow solar charging — a single 100 W panel on a 2,000 Wh station takes the better part of two sunny days.
Choosing the Right Solar Panels
Panels are not all interchangeable. Four things matter when pairing panels with a portable power station.
Match the Wattage to Your Station
As covered above, aim for the station’s maximum solar input. Going over wastes money; going far under wastes time. If your station accepts 500 W max, two 250 W panels or a single 500 W panel both work — the station sees the total.
Respect the Voltage Limit
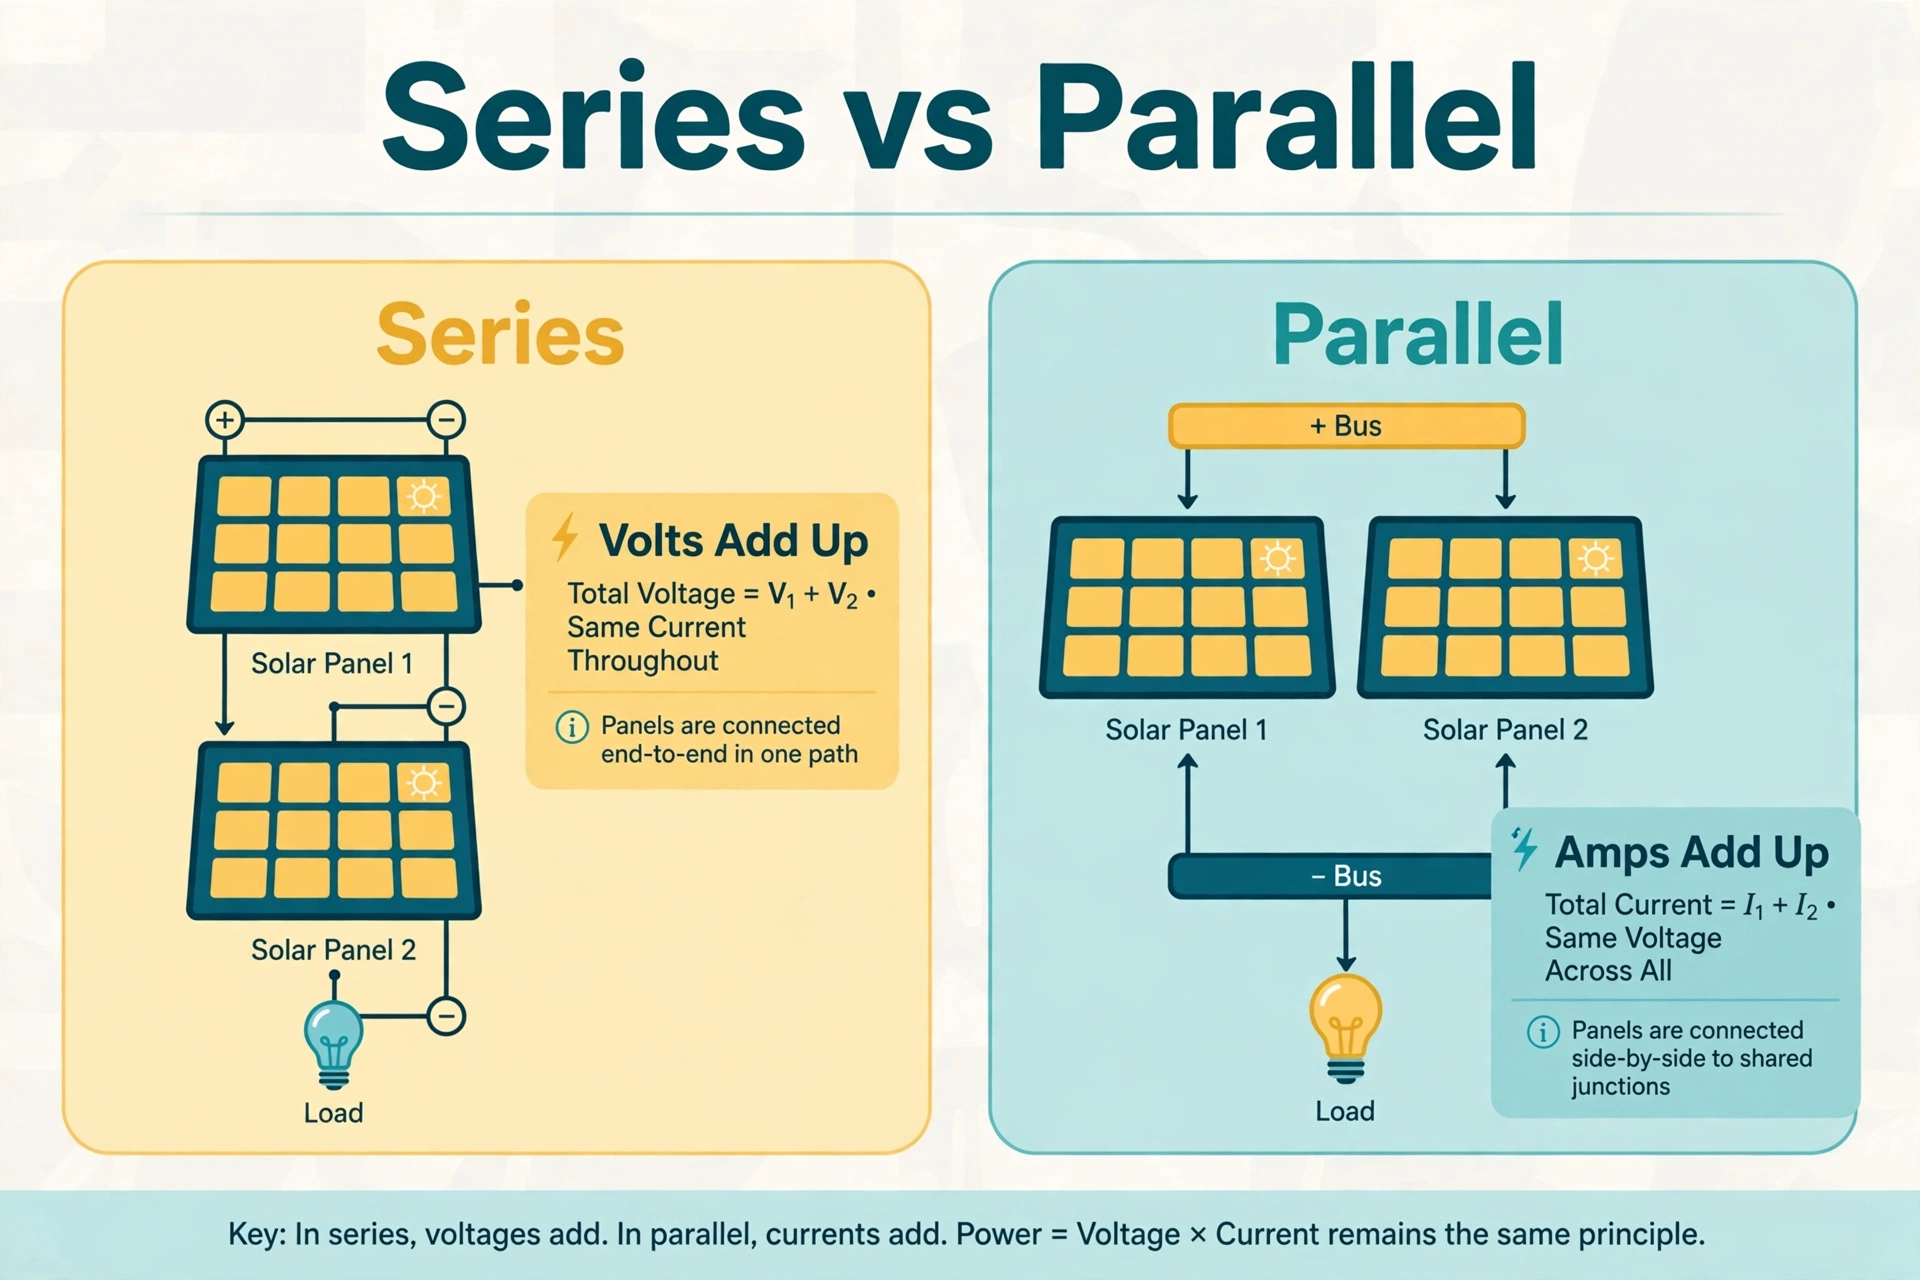
Every station also has a maximum solar input voltage (commonly 60 V on mid-size units). Exceeding it can damage the charge controller. Panel voltage adds up when panels are wired in series, so check the math: two 24 V panels in series make 48 V, which is fine under a 60 V limit — but three would not be. When in doubt, wire panels in parallel instead, which keeps voltage the same while adding wattage.
Portable vs Rigid Panels
Folding portable panels are light, pack flat, and are built for camping — but they cost more per watt. Rigid rooftop-style panels are far cheaper per watt and more durable, making them the better value for a fixed home-backup setup where you never move them. Many owners use rigid panels at home and one folding panel for trips. If home backup is your main goal, see our guide to the best solar generator for home backup for complete station-plus-panel pairings.
Connectors and Cables
Most solar panels use MC4 connectors, while power stations use proprietary solar inputs. You will usually need an MC4-to-XT60 (or similar) adapter cable — often included with the station, sometimes sold separately. Buy the adapter before your panels arrive, not after. Also keep cable runs short: long, thin cables lose measurable power, so place the station reasonably close to the panels.
Wiring Two Panels: Series vs Parallel
When one panel is not enough, you wire two together. You have two options, and the choice is simpler than it sounds.
Series wiring (panel to panel in a chain) adds the voltages together while current stays the same. It performs better in partial shade on some setups and lets you use thinner cables. The catch: total voltage must stay under your station’s max input voltage.
Parallel wiring (panels side by side into a branch connector) adds the currents while voltage stays the same. It is the safer choice when you are unsure about voltage limits, and if one panel gets shaded, the other keeps producing at full power.
For most portable power station owners, parallel is the default recommendation: simpler, safer on voltage limits, and more forgiving of shade. Series makes sense mainly for long cable runs or when your station’s voltage window specifically rewards it.
Real-World Factors That Slow Solar Charging
Lab ratings assume a perfect world. These are the factors that separate brochure numbers from backyard numbers.
Panel angle. Panels produce the most power when sunlight hits them straight on. Laying a panel flat at noon in summer is fine; the same flat panel in winter loses a large chunk of output. Tilting panels toward the sun — roughly matching your latitude angle — makes a noticeable difference, especially in spring and fall.
Shade. Even partial shade from a tree branch or a railing can cut a panel’s output far more than the shaded area suggests, because shaded cells drag down the whole panel. Place panels where they get uninterrupted sun for the core midday hours, and remember that shadows move — a spot that is sunny at 10 a.m. may be shaded by 2 p.m.
Heat. Solar panels lose efficiency as they get hot — typically a fraction of a percent per degree above 77°F (25°C). A panel baking on a dark roof at 140°F produces measurably less than the same panel in a breeze. Airflow underneath the panel helps; mounting flat on a hot surface hurts.
Clouds and haze. Thin clouds might cut output by 20 to 30%; thick storm clouds can cut it by 80% or more. This is why the 1.3 multiplier in the charging formula is a planning average, not a guarantee. On overcast days, expect charging to take roughly twice as long — or plan your power use around it.
Charging while using power. If you run a fridge off the station while the panels charge it, the net charge rate is solar input minus whatever you are drawing. A 400 W panel array feeding a station that is simultaneously powering a 150 W fridge only banks 250 W. For the fastest refill, minimize loads during peak sun hours.
What Size Setup Do You Actually Need?
Work backward from your power needs instead of guessing. List the devices you want to run during an outage or trip, note each one’s wattage, and estimate daily watt-hours. A phone (10 Wh), laptop (60 Wh), LED lights (20 Wh), and a mini fridge (400–600 Wh per day) total roughly 600–700 Wh daily — a 1,000 Wh station with 400 W of panels recharges that fully on any decent solar day.
For whole-home backup ambitions — running a full-size fridge, freezer, and more through a multi-day outage — you are looking at 2,000 Wh stations and 800+ W of panels, which is a different budget conversation. Our portable power station 2000W guide walks through what the large units can realistically power and which panel arrays pair well with them.
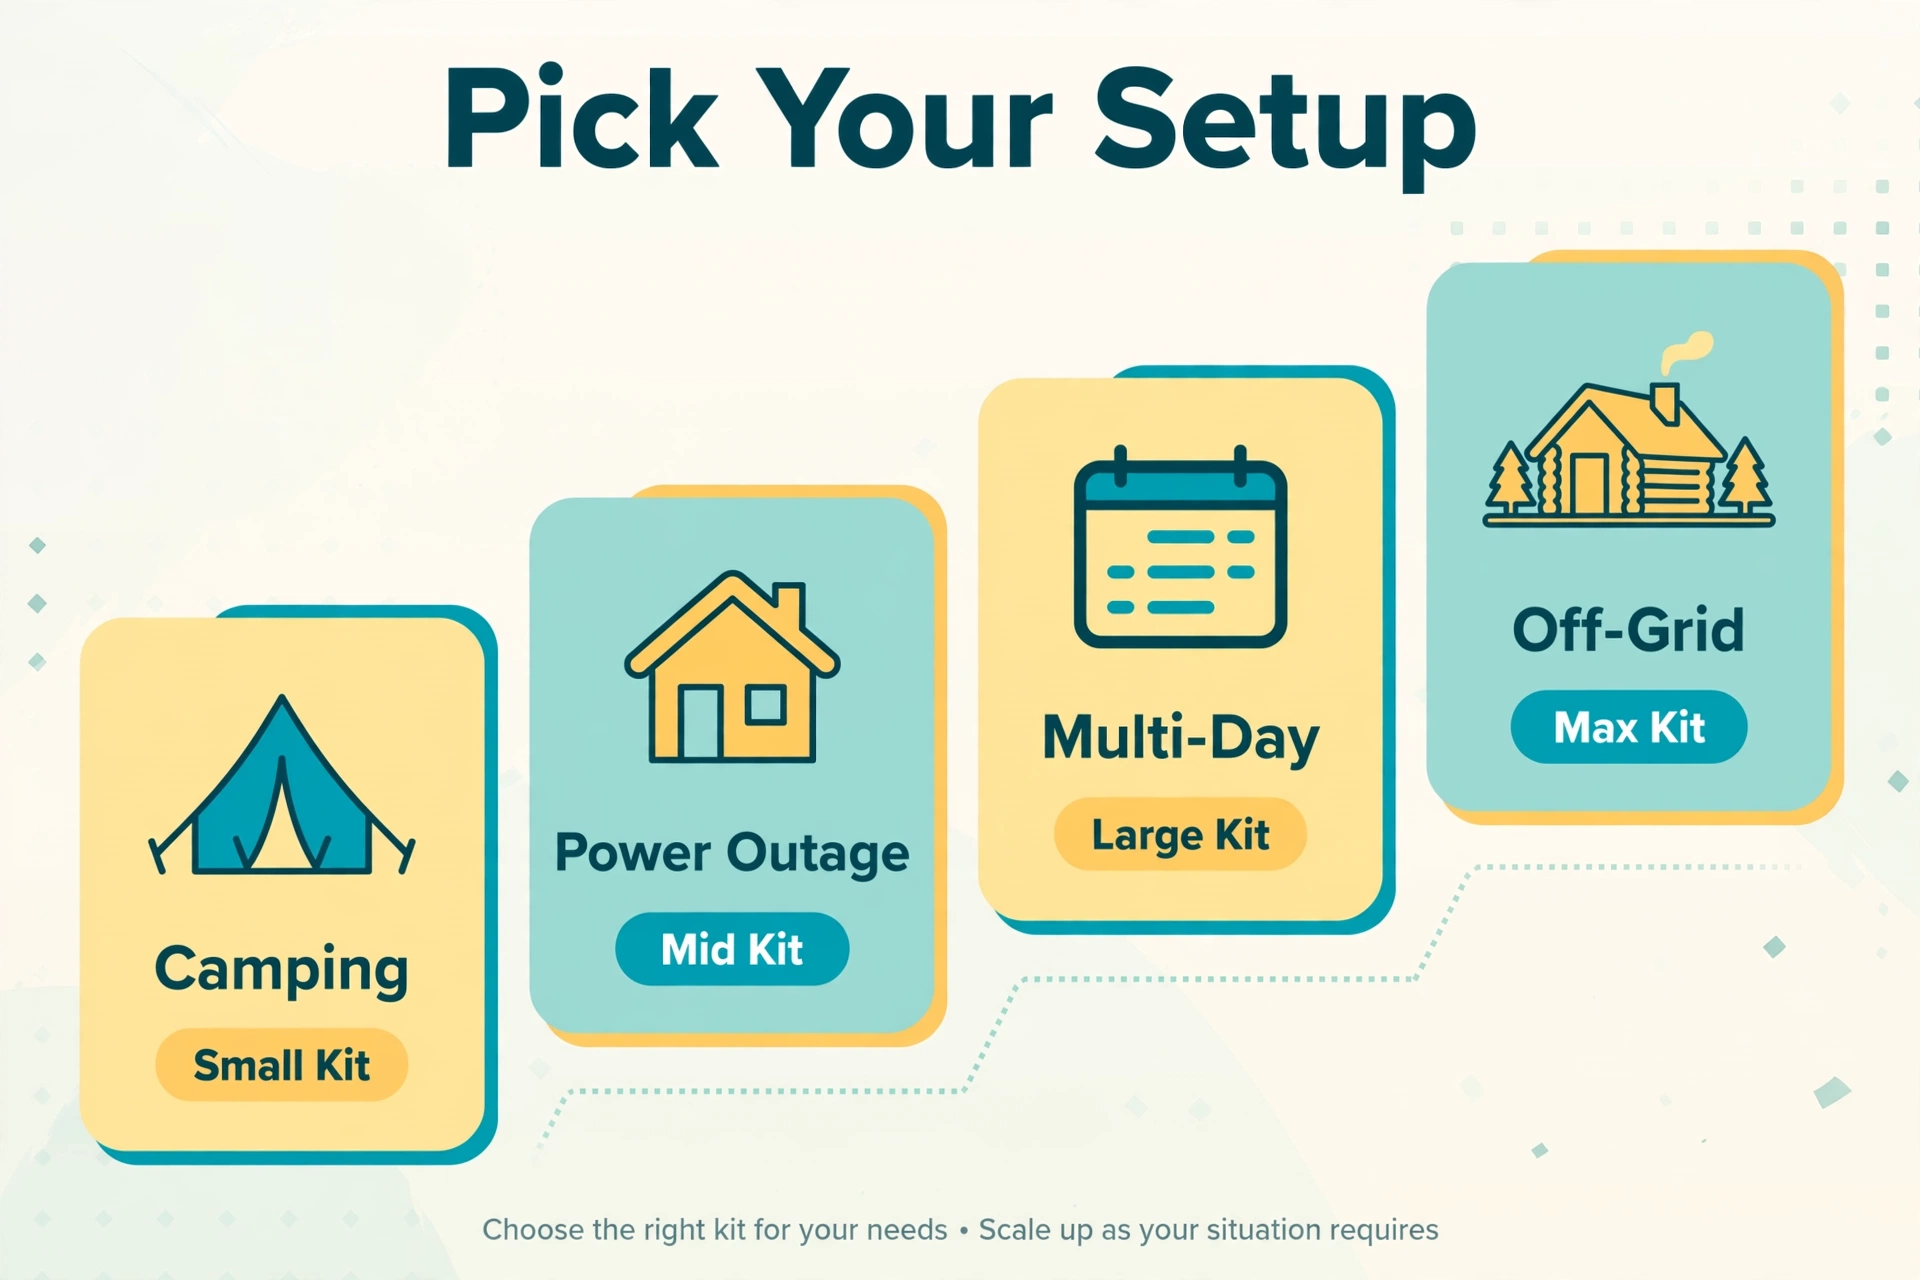
Table: Recommended solar setups by use case
| Use case | Station size | Panel wattage | Why it fits |
|---|---|---|---|
| Weekend camping | 500–1,000 Wh | 100–200 W folding | Light, packable, refills phones/lights/fridge daily |
| Day-long power outage | 1,000–1,500 Wh | 400 W | Refills in one sunny afternoon, runs fridge + essentials |
| Multi-day backup | 2,000 Wh+ | 800 W+ | Banks enough daily energy for fridge, freezer, and devices |
| Off-grid cabin / RV | 2,000 Wh+ | 800 W+ rigid panels | Permanent panels, cheapest per watt, daily cycling |
Frequently Asked Questions
Can I use any solar panel with my power station?
Mostly yes, with two conditions: total panel wattage should not exceed the station’s max solar input, and total voltage must stay under its max input voltage. Brand matching is convenient but not required — third-party panels work fine as long as the specs fit and you have the right adapter cable.
Do solar panels charge at night or in rain?
No meaningful charging happens at night — panels need light, not just daylight gloom. In rain or heavy overcast, output drops to a trickle, often under 10% of rated power. This is why sizing for your worst-case weather, not your best day, gives the most reliable setup.
Can I charge from solar and wall power at the same time?
Many modern stations support dual charging — solar plus AC wall input combined for the fastest refill. Check your station’s manual, because behavior varies by model. Dual charging is handy before a storm when you want the battery full as fast as possible.
How long do solar panels last?
Quality panels degrade slowly — typically around 0.5% of output per year — and carry 25-year performance warranties. Your power station’s battery will likely need attention long before the panels wear out. Buy panels once, and they will outlast two or three station generations.
Is a bigger panel always better?
Only up to your station’s max solar input. Beyond that limit, extra panel wattage does nothing — the station simply ignores it. Money spent past the cap is better put toward a second station, better cables, or a panel tilt mount that boosts real-world output.
The Bottom Line
Pairing a portable power station with solar panels comes down to three steps: pick panels near your station’s max solar input, estimate charge time with the watt-hours ÷ watts × 1.3 formula, and place panels where they get clean midday sun. Do that, and solar becomes a genuinely practical power source — not a gimmick.
Start with your actual power needs, size the station to them, then size the panels to the station. Resist the urge to buy the biggest panels first; an oversized array on an undersized station is money sitting in the sun doing nothing. Sized right, a solar-paired power station quietly keeps your essentials running through outages, trips, and off-grid days — with fuel that costs nothing and never runs out.
